Pages

Saturday, July 30, 2011

What's Baking In My Kitchen: Inside Out Carrot Cake - Muffins

So I came across this yummy looking recipe the other day and just HAD to try it because it looked and sounded so good! I've made mine "healthier" by substituting the sugar for Xylitol (A natural sweetener- better for diabetics) So I'll be marking the changes in bold as we go through the recipe.


Preheat the oven to 400°F. Lightly grease a standard 12-well muffin pan.
Or line the pan with paper muffin cups, and grease the cups. More on this later.

Let’s start with the filling. Place one unwrapped, 8-ounce package cream cheese or Neufchâtel cheese in a microwave-safe bowl, and heat on low power for 40 seconds.

Stir in 1/8th a cup of Xylitol
Stir until smooth. Set the filling aside while you make the muffin batter.

Whisk together the following:
2 1/4 cups (9 1/2 ounces)
1/4 cup Xylitol
1/8 cup dark brown sugar, firmly packed
1 1/2 teaspoons baking powder
¼ teaspoon baking soda
1 1/2 teaspoons ground cinnamon
3/4 teaspoon ground ginger
3/4 teaspoon salt

Place the following in a measuring cup or small bowl:
2 large eggs
3/4 cup water
1/3 cup vegetable oil
Whisk until well combined.

Stir the wet ingredients into the dry ingredients.
Add 1 cup grated carrots, lightly packed; about 2 medium-large carrots.
Stir to combine.
Note the word “stir;” beating isn’t necessary, and will toughen your muffins.

OK, time to experiment. To paper, or not to paper… that is the question. Will papers affect how the muffins bake? Will it make them easier to get out of the pan? And, is it necessary to grease the papers? We shall see.

Drop about 2 tablespoons of the batter (a tablespoon cookie scoop works well here) into each muffin cup, spreading it to cover the bottom.

Dollop on a heaping tablespoon of filling; a level tablespoon cookie scoop works well here, in the center of each.

 Cover with enough batter to fill the muffin cups quite full. The batter will come to within about 1/4″ to 3/8″ of the top of each muffin cup.


Bake the muffins for about 20 minutes.
When they’re done, a toothpick inserted into the cake part of one (not into the cream cheese filling) will come out clean. The tops of the muffins will feel firm to the touch.

Remember our paper/no paper experiment? The muffins on the left are in papers; on the right, no papers. Clearly the no-paper muffins rise more quickly. Which makes sense; there’s no paper insulating them from the oven’s heat.
By the end of the bake, though, the papered muffins had caught up, height-wise. So far, then – it’s a tie.

Remove the muffins from the oven, and immediately tilt them in their cups; a fork works well here.
I found it easier to tilt the papered muffins; they didn’t stick at all. The muffins without papers needed to cool a bit longer before they’d release from the pan. And, as they cooled, they were steaming a bit; which made their bottoms a bit tough.
Score one for papers.

Shall we break one open now, or wait for them to cool?

Now!
The center is molten. It’s actually a decadent experience, licking the melting, sweet cream cheese off your fingers.

But, if you’re not the finger-lickin’ type, wait 30 minutes or so for the muffins to cool a bit; the filling will stiffen up.

Oh, let’s finish our muffin papers experiment. Should the papers be greased, or not?
Definitely greased; the greased papers released the muffins without any sticking at all, while the ungreased papers tended to cling a bit, taking off a layer of crumbs as you removed them.


To see the originally recipe you can go to the King Arthur Flour Blog

Note: I lowered the amounts of sweetener aka Sugar in my recipe which I tend to do a lot, but also exchanged it for the Xylitol like I mentioned other than the brown sugar. Which I cut back on as well!

Thursday, July 28, 2011

My Digital Studio - Technique - Color Filling Stamps

Time for another MDS technique don't you think?! :) Now I know that for a lot of hardcore MDS users you go to the mydigitalstudio.net webpage and you've probably learned most of the techniques that I'm posting, but I still enjoy sharing what I learn with you! So far all the techniques that I've posted I learned at Convention in the Intermediate MDS class that I took. I'm one of these people that LOVES MDS but doesn't go looking to learn tons of new things in my free time... it's called I've got to many other things going on to try keep up with that as well! That being said I've decided that maybe I'm going to have to start "learning" some more fun stuff about MDS!

Anyway... now that i've said all that how about the tutorial for Color Filling Stamps! This is one of the techniques that Holly taught me and it's so fun, I'm sure you will think so too, so here goes:

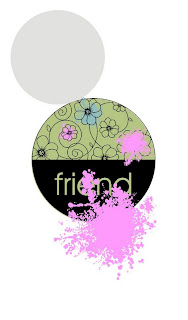
Step one: Select a "line Image Stamp" such as the Simple Friendship - Friend (below). Now to fill in the flowers you are going to use the Extreme Elements - Splatter image. Change the color of the Splatter image to whatever color you want. I used Baja Breeze and Pixie Pink, as well as Daffodil Delight for one blossom. You will resize the image until it fill just about the size of the flower. If there are a few splatters of color outside of the lines of the flowers that's ok. Especially because when we fill-color when we are stamping/water coloring it is never perfectly in the lines either!

Now to fill the centre of the circle I used the 1.25 circle punch and changed the fill color to Certainly Celery.  Once you have everything added and colored you are going to pull the Friend image and layer to the top/front. Save your project and you are ready to go!

Wasn't that quick and easy! So fun, and now you can color your line images in using a simple technique! Once again if you have any questions feel free to ask, I'll be happy to try answer them for you! In the mean time,  Happy Creating :)


Wednesday, July 27, 2011

Yogurt making

Yogurt is always in our fridge. I'm not sure how we would survive without having it in the house. One problem, any of the fruit flavoured yogurts that I've found here, without paying an arm and a leg for it, all have way more sugar in them than I want! So a while ago I came across this blog: http://stephanieodea.com/ and she had a recipe for slow cooker yogurt!

Now my mom has made her own yogurt off an on through out the years so I'm not unfamiliar with the concept of the yogurt making process. I just haven't done it now that we've been married. Time to bite the bullet don't ya think?!? So I decided that today was the day! Right now I've got the milk warming up in my slow cooker, I can't wait to see how it turns out! :)

Anyway for those of you who are interested the link is below, so you can try it yourself if you so happen to have the desire too!

http://crockpot365.blogspot.com/2008/10/you-can-make-yogurt-in-your-crockpot.html

Convention Day #2 - Thursday, July 14

Well, finally back to some more Convention stuff. I've been planning to do this but just hadn't gotten to that point yet! There are already a few pictures up from Convention, but I don't think I did much on the second day. So here goes.... Technically this post should actually be labeled Convention Day 1, but since Wednesday is packed with lots of different activities as well I always end up calling that Day 1.

Now for some fun pictures! Thursday started off with General Session, can you believe it.. over 3000 people (women and men) packed into one area, excited for Convention to begin! General swapping, while we all waited for Main Session to begin.


this years theme was Grow, main stage was all decked out in flowers, the coolest part of all was as Convention went on, they weren't always the same colors!


One of the new walks that was added to Convention, The First Timers Walk, several of the girls in my sideline got to walk on stage!


I couldn't resist taking a picture of the tables where our boxed lunches would be on later.


Look at the lucky winners! Who doesn't like Prize Patrol!


Everyone received a Simply Sent Kit! YAY :D


Dinner at the Olive Garden! Yumm. I think at this point we all needed a break and were just able to enjoy relaxing!


Can you tell how excited I was to be in Salt Lake!?! LOL :)  I also took lots of picture of the display area, but I have already posted a sampling of some of those picture while I was at Convention!

Then last but not least, Awards Night is Thursday night. 


So that was Thursday!


Tuesday, July 26, 2011

My +One

So Stampin' Up! has challenged all of us as demonstrator's to add at least one extra/new thing to our business'. This could be a class, club, doing a workshop etc. Challenges & Goals always seem to work well for me because it gives me something to work towards. The +One is no different, ever since SU! announced this I've been working on this and have been trying to come up with something that would work for me. Recently, I decided that I had had enough of procastinating and was going to put my plan into action. A lot of that actually had to do with going to Convention and coming home inspired to share SU! with everyone I talk to!

So I'm sure many of you are wondering what my + One is.... I'm happy to say that I'm super excited to now be offering a Stamper 10 group here in the US, where I live! This is something that has been a while in coming and I've been working hard to get to this point, but finally I decided that I could do it!! Oh, I have no problem leading the class, it was more a matter of having met enough people to be able to offer it! If this happens to be something you are interested in contact me today and I will be more than happy to have you join us!

My Digital Studio - Technique - multiple images in a punch

For lack of something better to call this technique, I'm calling it the Multiple Images in a Punch Technique. You have already seen this done in my other MDS technique post, because that is how I created the image effect in the tag. So are you ready to learn?!

Step one: First of all, when you open your project you are going to add a punch to your project. For mine I've used the Decorative Label Punch. Once the punch is added you are going to choose to paper fill the punch. Select the DSP you wish you use and click ok. Now you'll want to double click on the centre of the punch, you should get the Punch Image Editor to pop up. The nice part about the punch image editor is you can change the size of your DSP image so it is either larger or smaller. I'm going to make mine smaller, so that means I need to zoom out. I know.. isn't this amazing!?! I honestly didn't know about this until a few weeks ago! Once you get it to the size you want click ok and tada. Step one is completed!

Step two: Make sure your punch is still selected. Now you will want to go to your menu, click edit/copy. Then once again in your menu, click edit/paste in place. You should have two images directly on top of eachother. Double click on the top one to bring up the punch image editor again, you are going to click on the centre of the DSP area, and drag the "paper" to the side so that half of the punch now has nothing in it. Click ok when you have it moved to the desired area. Send punch to back.

Step Three: Now you will want to work with the 2nd punch. Double click to open image editor again, but this time you are going to choose to Replace Image. You can replace the image with any picture that you have on your computer and move it around the same way we did the DSP, by clicking and dragging. This picture is going to be on the opposite side of where you have placed your DSP image.

Step Four: Now that you have two punches with images in them feel free to layer them as you wish by either bringing the one to the front or the other to the back. Depending on how you have aligned the images. Once you have them the way you want them you may want to group the images so that you don't have to worry about them moving around on you. This also makes it much easier to move the image around on your project!


I hope that this makes sense... if you have questions let me know and I'll be happy to try answer them!  In the mean time, happy creating!

Tip: you can add multiple pictures to a punch if you want, you just need to align them so that the image that you want to see will show where you want it too.

Monday, July 25, 2011

Canning - A day in my life!

Well, I grew up in a household where we did a lot of canning.. I should say "A LOT" a second time because we seriously did. Every summer a few hundred quart jars of fruit and jam's would be put away. This was a process in which almost all of us kids got to be involved with, whether we liked it or not LOL :) Anyway.. the training must have paid off because here I am married and canning fruit myself now.

Today's canning wasn't for myself though. I decided to be nice and can cherries for my Mom, as well as, for my sister! Yes, nothing for me but for others, I guess this is where the sharing that Shelli talked about at Convention comes into play. We heard from my hubby's great aunt and uncle that they weren't going to pick the cherries in their orchard since they weren't worth picking this year. So that mean't that we could get them for nothing. All we had to do was come pick them. So on Saturday John went and picked on "tote" full, and then this morning I went and picked another one. Then once I got home, time to start cleaning them and putting them in jars, and the fun of canning begins!


Challenging.. well maybe a little! I've never had to can on a grill before, since I have a flat-top stove no more canning in my house unless I buy a new pan.. so forget that the grill works just fine! All in all I've got 50ish jars of cherries done, 20 for my sister and the rest for my mom.


Yes, the picture of the apple juice is critical! LOL.. we have been canning with unsweetned Apple juice for quite a few years now and really really like the taste. Way more so than sugar water, and the apple juice is a lot healthier as well!

Friday, July 22, 2011

My Digital Studio - Ribbon loops technique

So, one of my classes at Convention was on Stampin' Up!s My Digital Studio program. For those of you who aren't familiar with the program, it is a digital program that you can use to make, scrapbooks(either individual pages or full books) Cards, Tags, Journals, Calenders and almost anything that you can think of!

When MDS first came out I wasn't too sure if I would be a fan of it or not, after all I was sure I would never enjoy doing digital scrapbooks. Like I said a few weeks ago in one of my posts it's become so nice to be able to take it with me everywhere I go, when I go visit family, sitting in an airport, while we are on a road trip and John is driving. I LOVE IT! Quick and easy when you don't have a lot of time and are way behind with scrapbooking! So all that being said, yes I've become a huge fan and think that MDS is the program that every digital scrapbooker should use! Why? because the versatility, you can do so much with this program and some of the new tips/techniques that I learned at Convention just made it even more clear to me that we really do have an amazing program! While some of you may be sceptical you would be surprised what you learn by taking a class on MDS!

So I'm going to post a fun little tag that I created yesterday using two of the techniques that we used at Convention.


So I'm sure you've already noticed the fun little ruffle that was done with the ribbon. What you'll want to do is open the project you are working on. Then go to "insert" "add photo" from there you go to where you MDS program lives on your computer, so for me that is in My Computer/C: drive/Program Files/My Digital Studio. Now once you get to this point you will want to select "components" Click to open this you will get a list of all the different files you have in MDS, you will select the "embellishments" then select the type of ribbon you want. So for this instance I used the "striped grosgrain ribbon" Select the "Daffodil Delight bow" click "ok"

Once you have the bow added to your project you are going to double click on the ribbon image so you can crop it. You can crop the image now because you've added it as a picture. Select the loop of the bow
It should look like this now. You will rotate the image to the desired angle, the copy and paste as many as you want. Align them, group them. Then save this as a jpeg image in your C:drive (or where ever your MDS lives) in the My Digital Studio folder in a file that you create with the special images that you've created. This will make your life a lot easier next time you want to have fun loops on you project!

I hope that this makes sense to everyone, if not feel free to ask questions. Happy creating, and let me see what kind of fun projects you come up with using this technique. I hope to explain the other technique next time!

Thursday, July 21, 2011

More Convention fun

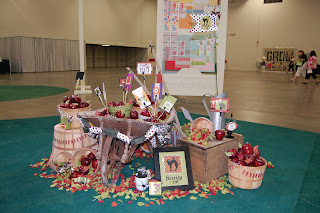
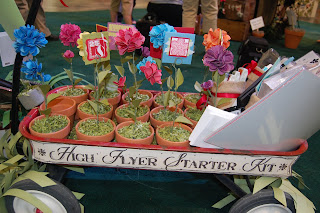
Well I want to share some more "fun" pictures from Convention. I found that the Product display section was AMAZING, and from some of these picture I'm sure you will agree! Enjoy :)


Doesn't this make you want to go to Convention? Ask me for more details and I can tell you how you can attend next year! With creativity, the sky is the limit!


Cards

Well, after I got back from convention, between swaps that I saw and demo's I was feeling really inspired. This worked out great seeing that I needed to make some cards.. two birthday ones, and an anniversary one. So I know I mentioned yesterday that I would post later with some fun ideas so here they are!


If you haven't noticed, check out the "bling" on all the cards! I got the Basic Rhinestone Jewels with one of my projects at Convention and have fallen completely in love with them, as you can probably tell. Most of the stamps that I used are new, other than the Happiness Always. That is the one I need to tell you a secret about and you won't like me for it, but it is a retired one! :( I was sad when that set retired because I loved it.. either way now I'm on a hunt for a new favorite sentiment stamp set!

Well enjoy your day, and check back later for some more card ideas. I still need to make my hubby one for our 2nd anniversary, which now I'm offically 5 days late for lol. As well as a Get Well card for a family member! So off I go :)

Wednesday, July 20, 2011

Negative side to being away!

Well I'm finding out in a really big hurry that I have really not been home enough this month! The end of June/beginning of July I was gone for about a week. Then last week I was gone again.. The result to all this travelling is that nothing is getting cleaned in my house. Well I know you are all saying, so what, if you aren't home it doesn't get messy. Which is true to a certain extent, other than the fact that I had a million and one things to get done in the week that I was home so my house didn't really get cleaned all that good other than the main living area. The end result of that being that there is a layer of dust on everything everywhere. Trust me I don't live well with dust, if I see that there is dust on my coffee table/end tables in my living room out comes the dust rag and I have to clean it all so it looks nice and clean again! I'm anal that way! lol :)

So what have I been doing since I got home..well other than making some cards because how could I not do so after being so inspired from Convention.. it has been a cleaning week! First with laundry, then cleaning bathrooms, from there dusting my livingroom, and then my bedroom and some other areas. I feel like my house is getting cleaner which is great.. BUT I still need to mop, and vacuum as well as see if I can't find a better way to organize my fabric, because right now it just isn't working for me. My extra room in my house has become my sewing room and it has piles of fabric everywhere. Then when I need a smaller piece of fabric I need to dig through the pile which means it isn't neat anymore and the re-organizing begins once again. ugh!

The other thing that I got to do once I got home was pick my beans and peas from my garden. While they are yummy when they are fresh I was like "really" because I honestly didn't need more work right now lol :) That being said we've really been enjoying them so I'll stop complaining! I also have a gallon of raspberries that I need to put in containers or baggies to go into the freezer. So lots of fun things happening here!

Anyway, watch out for the next post in a while because I promise there will be some fun included in that one! :)

Monday, July 18, 2011

Village of Cute-ness - Convention + One

Check out my cute little Village. This was one of the + One classes that we could choose to register for at Convention this year. At first I wasn't too thrilled that this was the only class that I could still get into, but now that I've got my little houses made I have to admit that they are pretty stinkin' cute! Check them out :)


So here they are.. :)

Convention '11 Goodies!

So obviously I came home with some fun goodies that I got, and some that I bought in Memento Mall. I also won something from Prize Patrol. So more than enough fun things came home with me :D

Here are some pictures of them.
Here is my table full of my "fun" stuff :)


Classes, stamp sets, MDS DVD, Make & Takes, Memento Mall... hmm what else, oh and my Prize Patrol stamp set the Doily!! eeek


Here is my +One class stuff, I did the Village of Cuteness and as you can see my houses aren't done yet. I did what I had to there and left the rest to finish at home.


Memento Mall items: I got two tops which aren't in the picture here, and then a set of pens, the DSP sampler, a garbage can, the Workshop Wow DVD, 2 sets of Workshop Pocket boards, Ribbon samplers, a Snail leash, and the SU! Logo sign to hang up when I do bazaars etc.  So definitely lots of fun stuff!!


Here are most of the stamp sets I came home with.  One of them was a demonstrator/convention exculsive one which was really exciting. We could earn this one by attending all our classes and having more than 5 stickers in our book! Whooot!

All in all, Convention was awesome and I am so happy that I could go this year! :)

I almost forgot.. but one more thing from Memento Mall... :)


Doesn't my laptop look wonderful now :)

Convention Highlights

Check out the SU! Convention Highlights video!


Ask me how you can attend Convention next year!

Thursday, July 14, 2011

Convention 2011 - Update #2

So, here is update #2 for those of you who want to see some more! :) All i can say is that there is tons of wonderful things happening at Convention and I'm so excited and thrilled to be part of this experience again! Convention for the 2nd time isn't half as exciting as the first time. Don't get me wrong it's absolutely wonderful but there is not BIG surprises as in not knowing what to expect! Anyway it's all good.. I am super pumped about some of the fun things that we learned about how to use My Digital Studio better in a class today, some of the fabulous give-a-ways that they had.. and the fact that we as demo's at Convention get to SEE/HAVE the Holiday Mini before everyone else!!! Yup top secret so I can't tell you other than I'm sure you'll love it too!


I have lots more that I could share but right now I'm off to Awards Night with some friends! I'll post more later!!

Wednesday, July 13, 2011

Convention 2011 - Update #1

So today was check in day for Convention, the day that we get to get our bag. I'm super excited about the bag, and plan to share pictures of that once I get home. For now since I know some of you really are wanting to see something fun, how is this for fun??! :)

Just before we got to go around the corner into Memento Mall they had a display case full of these cards, with the cutest little card stands every.. what would you know the card stands were in Memento Mall! WHOOOOT :)

 I had to take a quick picture of the girl who check me out of Memento Mall.. for my scrapbook, what else lol!


 Some wonderful new friends I made since I needed someone to hang out with for my Riverton trip and everyone else had deserted me :( lol.. it was great and I had so much fun with them! Here we were waiting in line at the Convention Centre for the next bus to come and get us. 


Finally, at the Headoffice/distribution centre in Riverton. YAY :D


 Also finally a quick snapshot of the building!


Stampin' Up! I LOVE you!!!