Pages

Showing posts with label technique. Show all posts

Thursday, August 11, 2011

My Digital Studio: Technique #4 - Color Filling Line Images using Punches

Ok, so I've decided that my laptop is officially in a love hate relationship with me.. or my internet. I'm actually not sure which one it is. Regardless I'm keeping my fingers crossed that I can get this posted!

So are you all ready to learn this new technique?!

Step #1
1. Open your MDS software on your computer.
2. Then you are going to select - New Project
3. Select Tag
4. Select 2 1/4 x 4 1/4 Portrait
5. Create your Own tag
6. Name project
7. Change your background color to Very Vanilla
8. Next add your line Image stamp. I used the bird from the set Friends 24-7
9. Select the shape punch that will work the best for your image. I used the Oval.
10. Fill your punch, by clicking on Paper Fill
11. Now you'll want to double click on your filled punch image to bring up the Punch Image Editor. You are going to drag the Fill paper out of the punch so once again it is blank/empty.
12. When you return to your project you'll be able to see that the punch is there due to the gray squares outlining the punch.

13. Select Drop Shadow from the Punch Menu in Design Center. Set Opacity to 50%, Change Blur to Medium, and change your color to your desired color.

14. Do the same for all other area's that you want to color fill.

15. Once you are all done, Select your image and bring to front.
 And there you have my final product. So now whenever you need tags for something.. use MDS :)

I hope that you learned something fun and hope that you'll use it in your future products! This is all for the Techniques on MDS that I learned things about at Convention. I promise I will try post some other ones in the future though!

Tuesday, August 02, 2011

Technique: In-Laid Embossing - Polka dot fun - Card

This was one of my "quick" I need a card now projects. My Father-in-law had his birthday a little while back and like usual I waited until just before we had to leave to go make a card! (ask my hubby he gets frustrated at times, he's always waiting for me to finish making a card)

 
 I'm sure for some of you this technique is nothing new, but I want to share it with you anyway :) So here goes.


First you are going to punch out various sizes of circles using our circle punches. Then you will glue them onto the front of the card.  You'll want to make sure that you have prefolded your cardstock and only the front gets placed on your embossing pad. Once it's embossed, you will add the sentiment by gluing it on with the Multipurpose Liquid glue.

I'm not giving you measurements for any of this because most of this card depends on what sentiment image you choose to use. Stamp that on a piece of cardstock and layer accordingly with the other colors beneath that.

Now here is a closer look :)


I hope that you enjoyed this fun card, and I hope that you are feeling inspired to go try it yourself now! If you need any supplies let me know, or you can shop from the convenience of your home.

Canadian Customers: http://www.stampinup.net/esuite/home/alisescreativity/
USA Customers: http://www.stampinup.net/esuite/home/stampinwithalise/

If you have any questions let me know and I'll be more than happy to help you out! 

Thursday, July 28, 2011

My Digital Studio - Technique - Color Filling Stamps

Time for another MDS technique don't you think?! :) Now I know that for a lot of hardcore MDS users you go to the mydigitalstudio.net webpage and you've probably learned most of the techniques that I'm posting, but I still enjoy sharing what I learn with you! So far all the techniques that I've posted I learned at Convention in the Intermediate MDS class that I took. I'm one of these people that LOVES MDS but doesn't go looking to learn tons of new things in my free time... it's called I've got to many other things going on to try keep up with that as well! That being said I've decided that maybe I'm going to have to start "learning" some more fun stuff about MDS!

Anyway... now that i've said all that how about the tutorial for Color Filling Stamps! This is one of the techniques that Holly taught me and it's so fun, I'm sure you will think so too, so here goes:

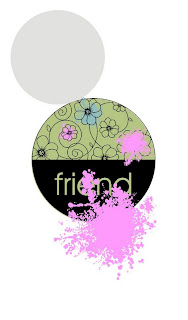
Step one: Select a "line Image Stamp" such as the Simple Friendship - Friend (below). Now to fill in the flowers you are going to use the Extreme Elements - Splatter image. Change the color of the Splatter image to whatever color you want. I used Baja Breeze and Pixie Pink, as well as Daffodil Delight for one blossom. You will resize the image until it fill just about the size of the flower. If there are a few splatters of color outside of the lines of the flowers that's ok. Especially because when we fill-color when we are stamping/water coloring it is never perfectly in the lines either!

Now to fill the centre of the circle I used the 1.25 circle punch and changed the fill color to Certainly Celery.  Once you have everything added and colored you are going to pull the Friend image and layer to the top/front. Save your project and you are ready to go!

Wasn't that quick and easy! So fun, and now you can color your line images in using a simple technique! Once again if you have any questions feel free to ask, I'll be happy to try answer them for you! In the mean time,  Happy Creating :)


Tuesday, July 26, 2011

My Digital Studio - Technique - multiple images in a punch

For lack of something better to call this technique, I'm calling it the Multiple Images in a Punch Technique. You have already seen this done in my other MDS technique post, because that is how I created the image effect in the tag. So are you ready to learn?!

Step one: First of all, when you open your project you are going to add a punch to your project. For mine I've used the Decorative Label Punch. Once the punch is added you are going to choose to paper fill the punch. Select the DSP you wish you use and click ok. Now you'll want to double click on the centre of the punch, you should get the Punch Image Editor to pop up. The nice part about the punch image editor is you can change the size of your DSP image so it is either larger or smaller. I'm going to make mine smaller, so that means I need to zoom out. I know.. isn't this amazing!?! I honestly didn't know about this until a few weeks ago! Once you get it to the size you want click ok and tada. Step one is completed!

Step two: Make sure your punch is still selected. Now you will want to go to your menu, click edit/copy. Then once again in your menu, click edit/paste in place. You should have two images directly on top of eachother. Double click on the top one to bring up the punch image editor again, you are going to click on the centre of the DSP area, and drag the "paper" to the side so that half of the punch now has nothing in it. Click ok when you have it moved to the desired area. Send punch to back.

Step Three: Now you will want to work with the 2nd punch. Double click to open image editor again, but this time you are going to choose to Replace Image. You can replace the image with any picture that you have on your computer and move it around the same way we did the DSP, by clicking and dragging. This picture is going to be on the opposite side of where you have placed your DSP image.

Step Four: Now that you have two punches with images in them feel free to layer them as you wish by either bringing the one to the front or the other to the back. Depending on how you have aligned the images. Once you have them the way you want them you may want to group the images so that you don't have to worry about them moving around on you. This also makes it much easier to move the image around on your project!


I hope that this makes sense... if you have questions let me know and I'll be happy to try answer them!  In the mean time, happy creating!

Tip: you can add multiple pictures to a punch if you want, you just need to align them so that the image that you want to see will show where you want it too.